(Last updated May 2020)
The Buttons Section
The fourth section in the Question Design Editor is the Buttons section. Under the Buttons section authors can add up to three (3) buttons to a question, give the button a label, associate variables with a button, set the destination of each question, and manage the counting variable for a repeat dialog.
Adding & Labeling Buttons
By default, there is a Continue button in each question (figure below). There must always be at least one button per question, because it is through the click of a button that the end-user advances through the A2J Guided Interview. However, it is possible to have up to three (3) buttons (figure below). The button labels are dynamically sized as additional buttons are added. To add or delete buttons select from the drop down list next to “Number of Buttons” or click the + or - signs to the left of the button label (figure below). The name of each button is then typed in the “Label” field.
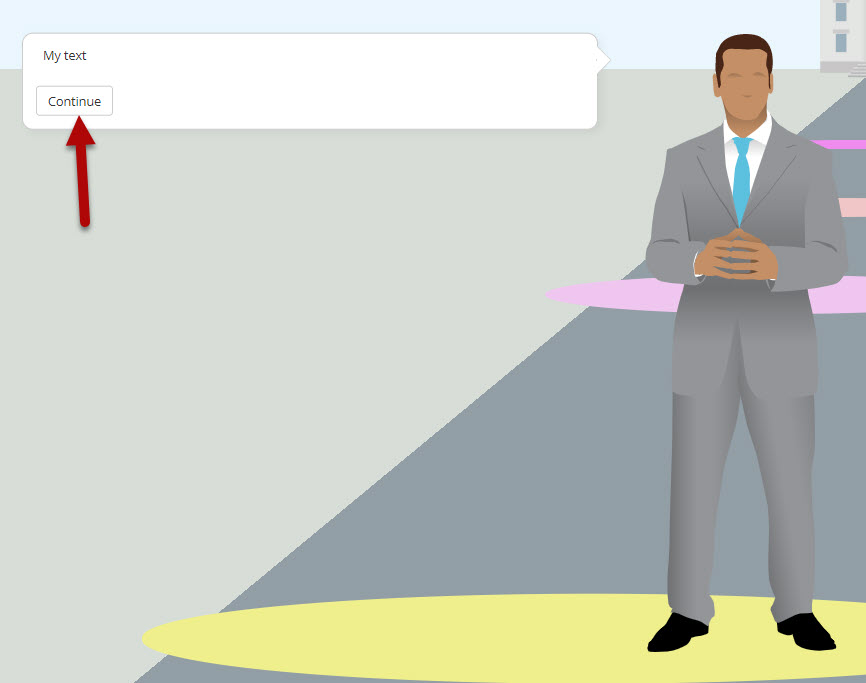
Figure: Default “Continue” Button.

Figure: Example of three buttons.

Figure: Adding or Deleting Buttons.
Associating Variables
The author can associate a variable with a button, such that if the button is selected the variable will be set to a designated value. This is useful when collecting information from the end user that does not require them to type in a field. For example, the question “Are you married?” can be answered with 2 buttons. One button would be labeled “Yes” with the variable [Married TF] and the value set to “true”. The other button would be labeled “No” with the variable [Married TF] and the value set to “false”. See figure below.

Figure: Buttons used to set variable values.
Setting A Question’s Destination
Each button has a question destination field that allows the author to direct the end-user to the appropriate question following the completion of that question. This is the way that the author branches the end user through the A2J Guided Interview. The default destination for a button is [no where] (figure below). If the destination field is set to [no where] the end user or tester in Preview Mode will not be able to move on to other questions in the A2J Guided Interview.

Figure: A question with no destination set from the authoring perspective.
To select a destination for a particular button, click the "Set Destination" button  . A2J Author will open a new window with a list of all the questions available in this A2J Guided Interview. From the question set, select the desired destination question by clicking on it and then click “Change” (figure below).
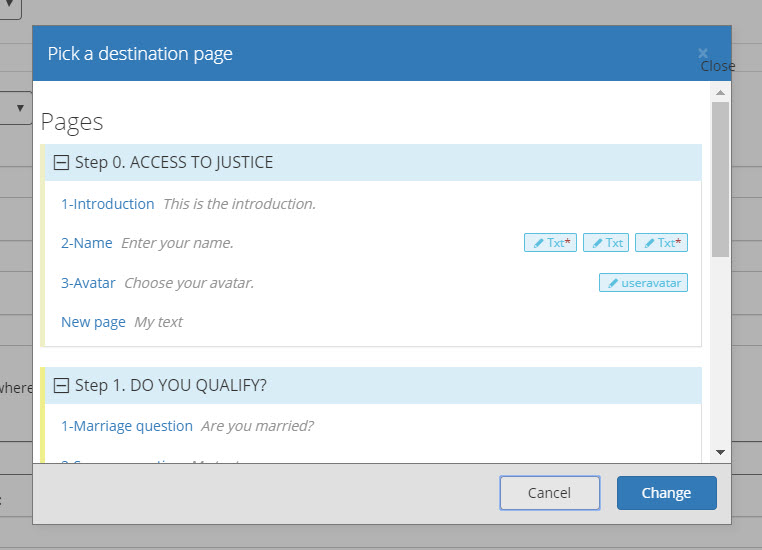
Figure: Pop out window of all available destination questions.
There are eight alternative destinations to a question. These are referred to as “Special Branching” questions. They are fixed destinations within A2J Author. One was already mentioned above: [no where]. The other five are: [Success – Process Form], [Exit – User does not qualify], [Exit - Save Incomplete Form], [Back to prior question], [Resume Interview], [Assemble - Generate PDF document], and [Assemble - Generate PDF and Process Form]. (See the figure below)
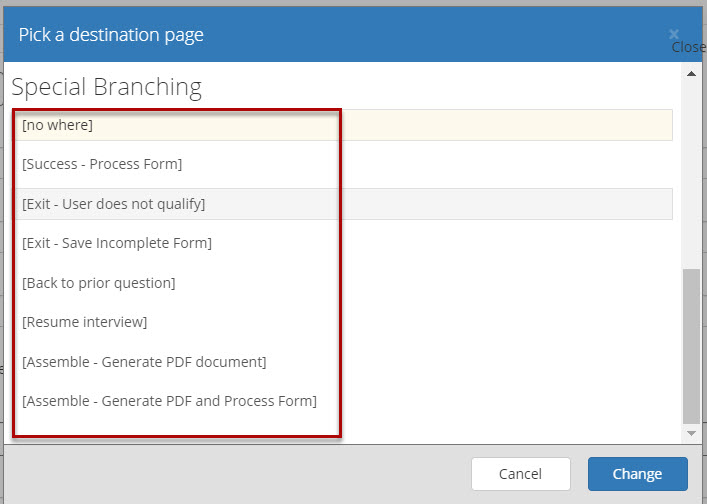
Figure: Special Branching destinations list.
[Success- Process form]
The Success-Process Form destination sends the A2J Guided Interview data to the host server (that can be A2J.org, LawHelp Interactive, or a self-hosted site).
[Exit- User does not qualify]
The Exit - User does not qualify destination allows authors to exit the end-user from the interview entirely. It also provides a URL field, so that authors can send them to a particular place on the web, perhaps your organization’s website (see figure below).

Figure: Exit - User does not qualify Destination.
[Exit - Save Incomplete Form]
The Exit - Save Incomplete Form destination allows the end user to leave the interview without completing it and save their answers to the host organization's website. They can then come back and reload their saved answer file, returning with their previously completed answers. The answer file is sent onto the host organization similar to [Success - Process Form] but the variable [A2J Incomplete TF] is set to true. This requires the host organization to have the ability to save user answers and have a user management system in place. Currently, both A2J.org and LawHelp Interactive have this capability.
[Back to Prior Question]
The Back to Prior Question destination allows authors to send the end-user to the next previous question they visited regardless of how they arrived at the present question. Thus, the Back to Prior Question works identical to the “Back” button that appears in the navigation menu for the end-user. One way this can be used is by the author that sets up a question with the destination set to [Back to prior question] for one button, labeled “Go Back”, and the destination set to [Exit - User does not qualify] for a button labeled “Exit”. This can be a secondary verification question for instances when the end user may have made a mistake and would want to go back and change their answer, instead of automatically exiting the A2J Guided Interview. See the figures below for an example of this.
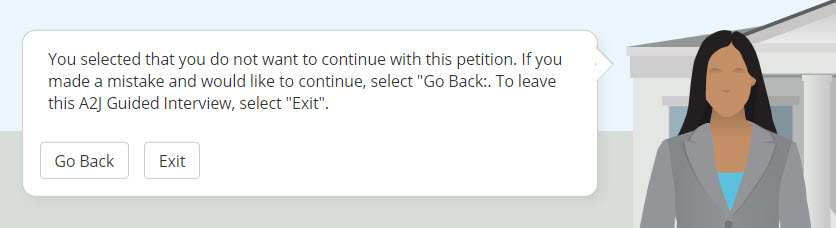
Figure: Back to Prior Question used in a button labeled "Go Back."
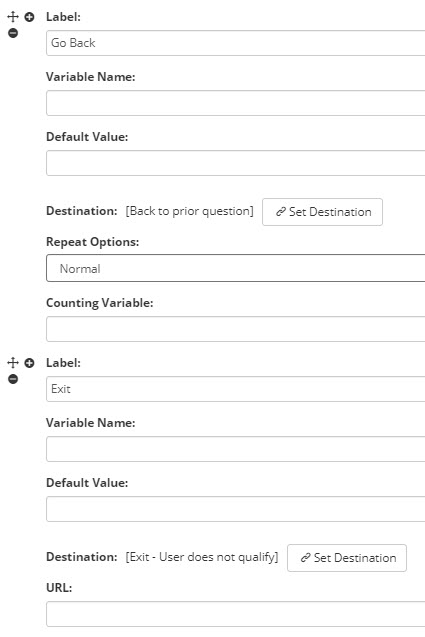
Figure: Back to Prior Question set in Button section of Question Design Editor.
[Resume Interview]
The Resume Interview destination should only be used for the stand alone question used as an exiting question. It allows the end user to return to the place in the interview from where they clicked the "Save and Exit" button  . It has the same functionality as the "Resume" button
  in the top navigation bar (only visible when the end user clicks the "Save and Exit" button initially. For more information on Save and Resume, See Chapter 6: The Steps Tab, Section "Starting and Exit Points (Exit: Save and Resume)".

Figure: Resume button in Preview
[Assemble - Generate PDF document]
The Assemble - Generate PDF document is a special exiting button used exclusively with the A2J Document Assembly Tool (A2J DAT). It should not be used with a HotDocs Template. It generates the PDF document for the end user, but leaves the browser window open for them. It does not send their answer file on to any server or save any answers for the end user.

Figure: Assemble - Generate PDF document as destination for "Get Document" button.
[Assemble - Generate PDF and Process Form]
The Assemble - Generate PDF and Process Form is a special exiting button used exclusively with the A2J Document Assembly Tool (A2J DAT). It should not be used with a HotDocs Template. It generates the PDF document for the end user and then sends the A2J Guided Interview data to the host server (that can be A2J.org, LawHelp Interactive, or a self-hosted site). The second portion - the Process Form portion - operates the same way as "Success - Process Form".

Figure: Assemble - Generate PDF and Process Form as Destination
Counting Variable for Repeat Dialog
The Buttons section is where authors manage the variable that will “count” the number of times a repeat dialog is repeated. Under the Buttons section a Counting Variable is “set” to 1 at the beginning of a repeat dialog and “incremented” at the end of a repeat dialog (Figure below). For complete instructions on how to construct a repeat dialog, see the subheading in this chapter entitled “Repeat Dialogs.”

Figure: Option field to manage the counting variable for repeat dialogs.