
Configuring the CALI A2J Viewer + DAT on Azure
Tobias Nteireho
2018/02/01
This document illustrates the process used to serve the A2J DAT (Document Assembly Tool) on the Microsoft Azure platform. The document will be updated as the process is updated. The tutorial was developed on an Apple Macbook Air with High Sierra 10.13.2 using Node 6.9.5, firefox, chrome, and MS Remote Desktop Client 8.0.43 on the client end and Windows Server 2016 on the server end but is adaptable to support all browsers supported by Azure and Operating systems that support Node 6+
Setup Azure VM:
Go to portal.azure.com and login. You should be presented with a dashboard.

select new and create Windows Server 2016 VM

Fill out the fields

Select a VM size. Azure lists recommended sizes but other sizes can be found by clicking view all


The size used for this tutorial was a B2S standard which includes 4GB of RAM and 2 virtual CPUs and is priced at approximately $54/mo. This provided tolerable demo performance for minimum price. A higher specced VM can of course be chosen, if desired or required.

After hitting the select button, Azure setup takes you to step 3 (Settings). This space is for the initial configuration of network, availability, storage, firewall, monitoring, extensions, and automatic shutdown. Most settings will be filled automatically and the values generated should be appropriate.

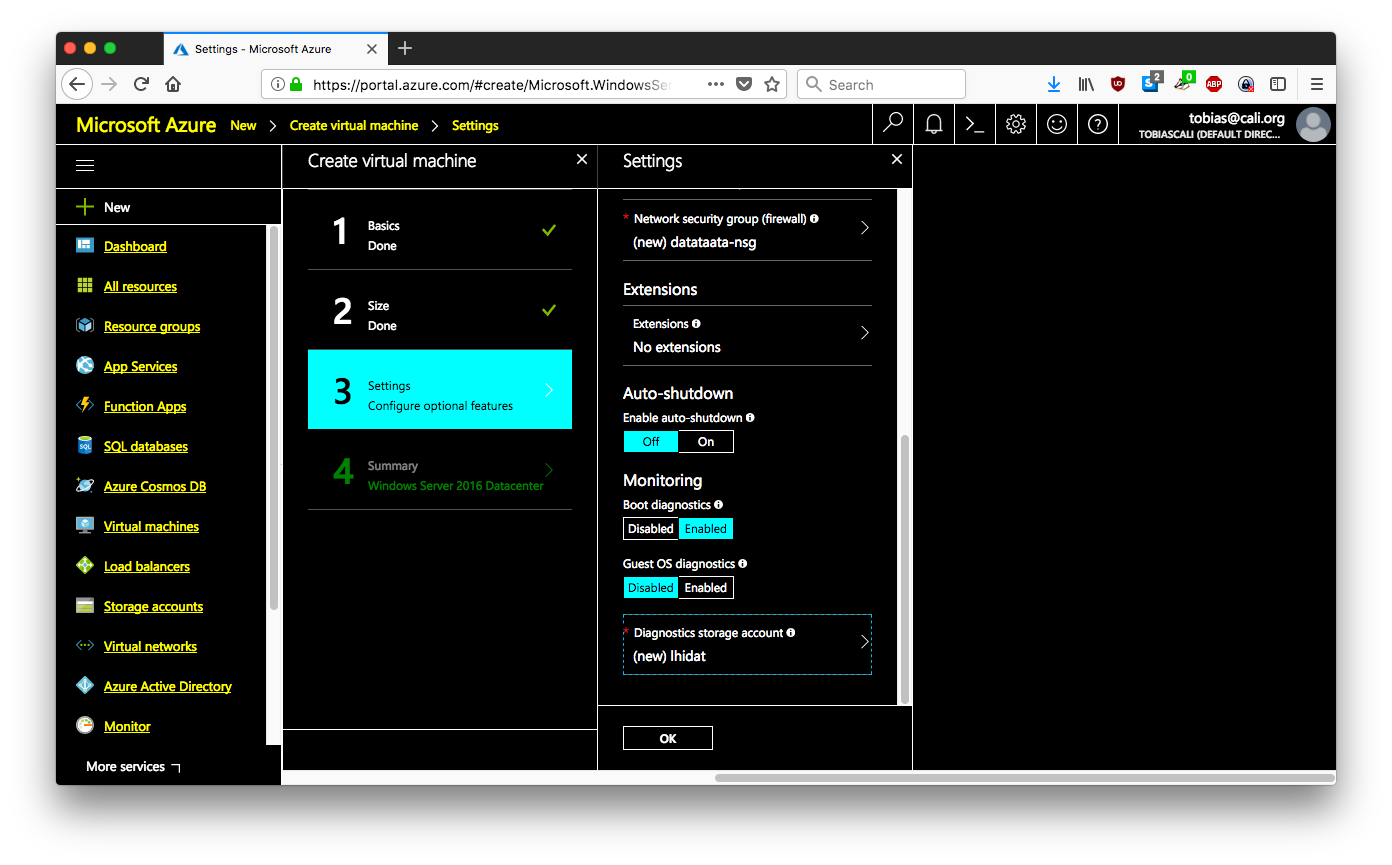

After clicking ok, you should be taken to step four which summarizes your install.

Click Create and wait for install to be created. This may take several minutes.
Configure Firewall
Now that the VM is setup, you need to configure your firewall by opening up the appropriate ports.
Click All resources in the sidebar to arrive at the screen similar to below and click the network security group attached to your VM. This is typically labeled in the pattern of <name-of-your-vm>-nsg.

Click Inbound security rules
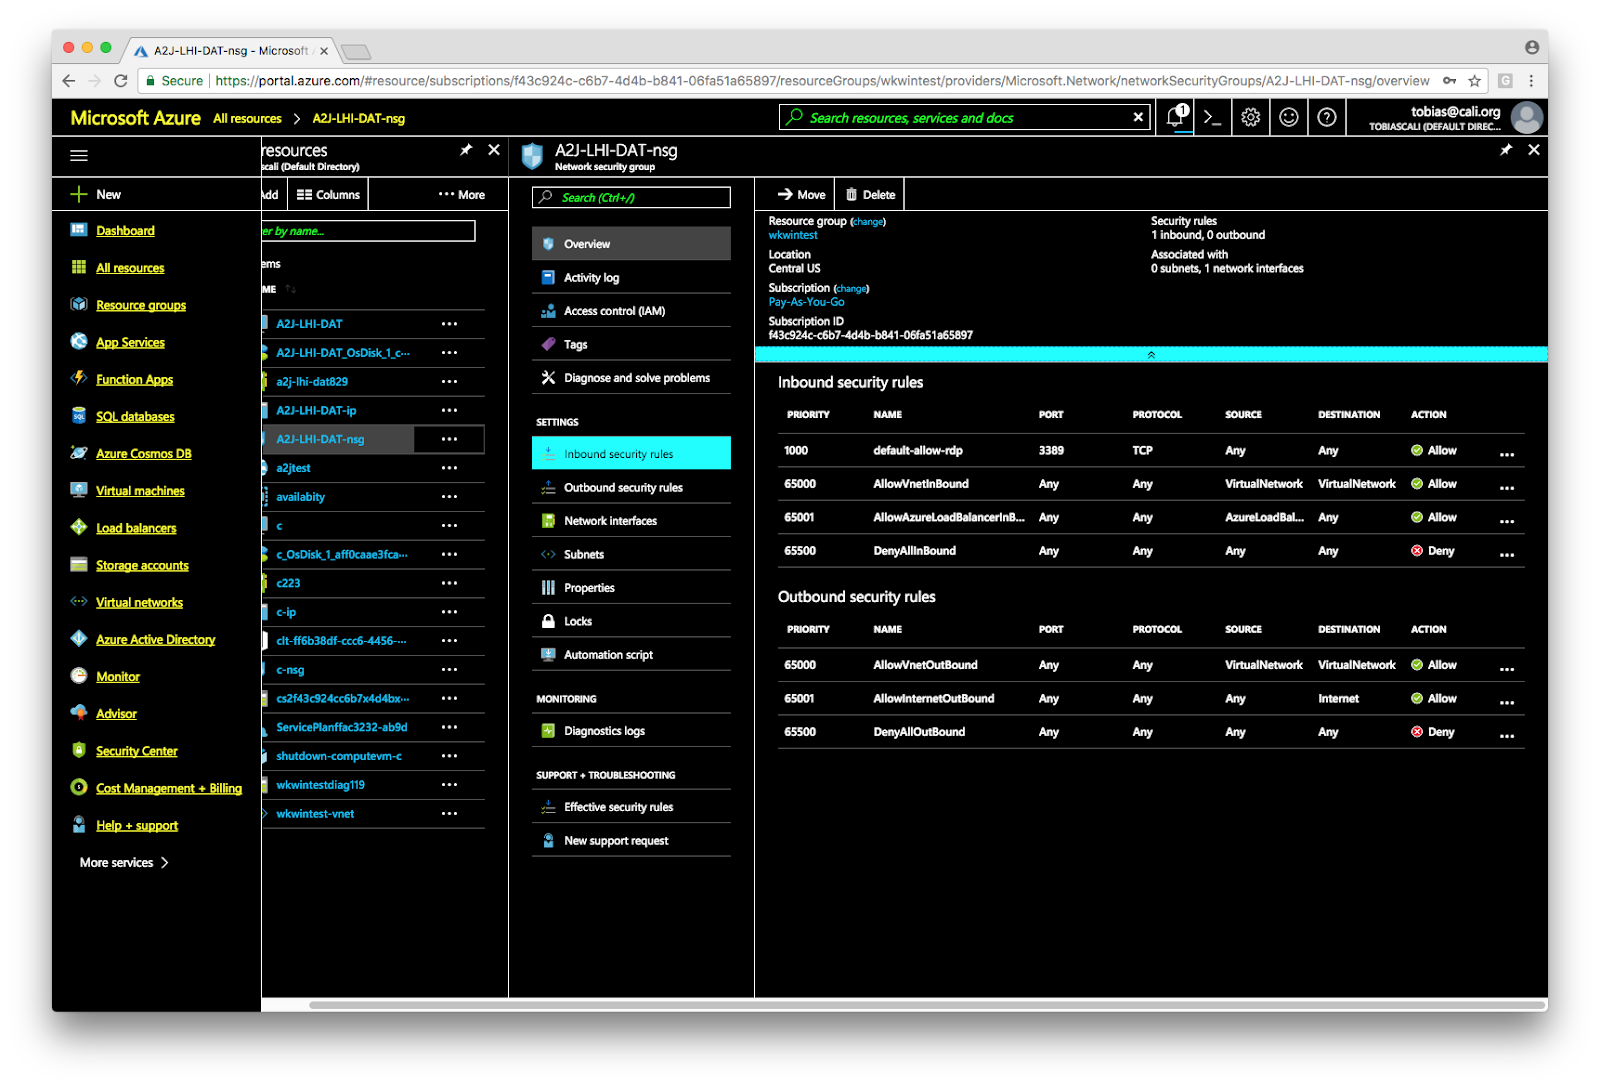

Click + Add. We will now add a rule for port 80 to serve http requests.


Fill in fields as above and click OK
Now we need to set the ip address to static so the site will be accessible from the same address. Go to All Resources and click the ip address resource assigned to the VM. This is typically labeled as <name-of-your-VM>-ip. The screen illustrated below will appear. Select Static and Save.

If you navigate to the ip address given, the default IIS html demo page should appear

Setup IIS:
Go to the VM Resource page and If the VM is not started, start virtual machine. Once the VM has started select Connect

You will likely be prompted to update the OS. Execute the updates. This may take a few hours. When the updates have finished open Server Manager.This usually launches on automatically but can be launched by typing server manager in the search bar.
When it launches, select Add Roles and Features


Click next to select Installation type

Select Role-based or feature based installation and Click next

Select the server and click next

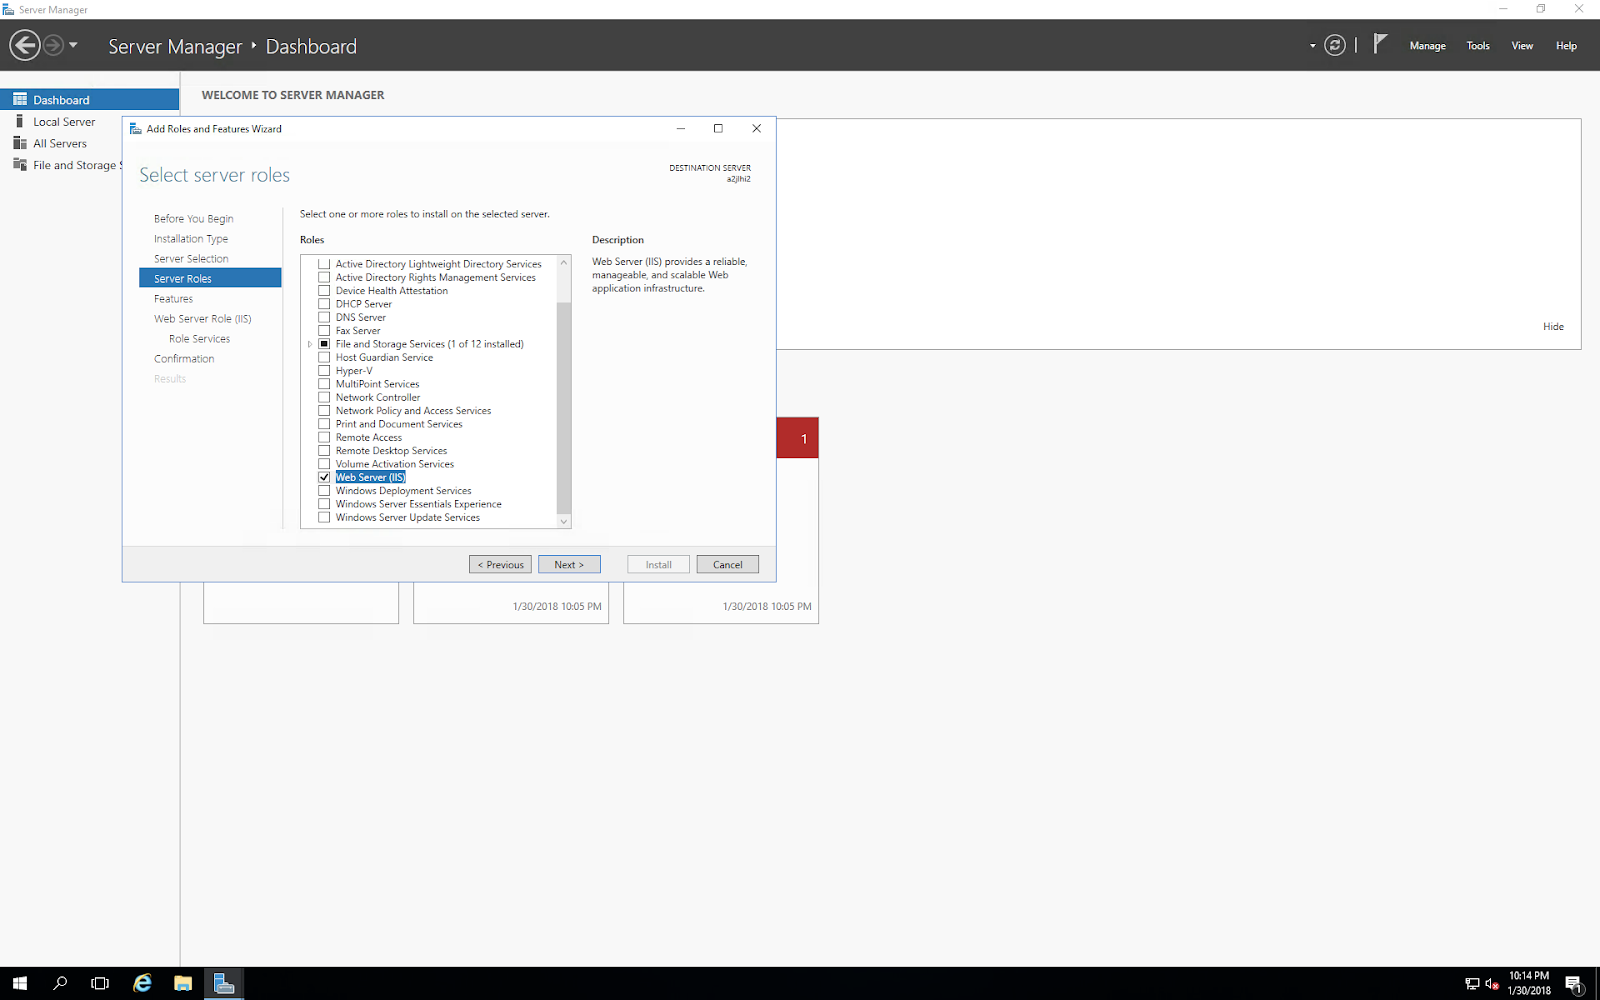
Files and storage will likely be partially selected. Click Web Server (IIS)
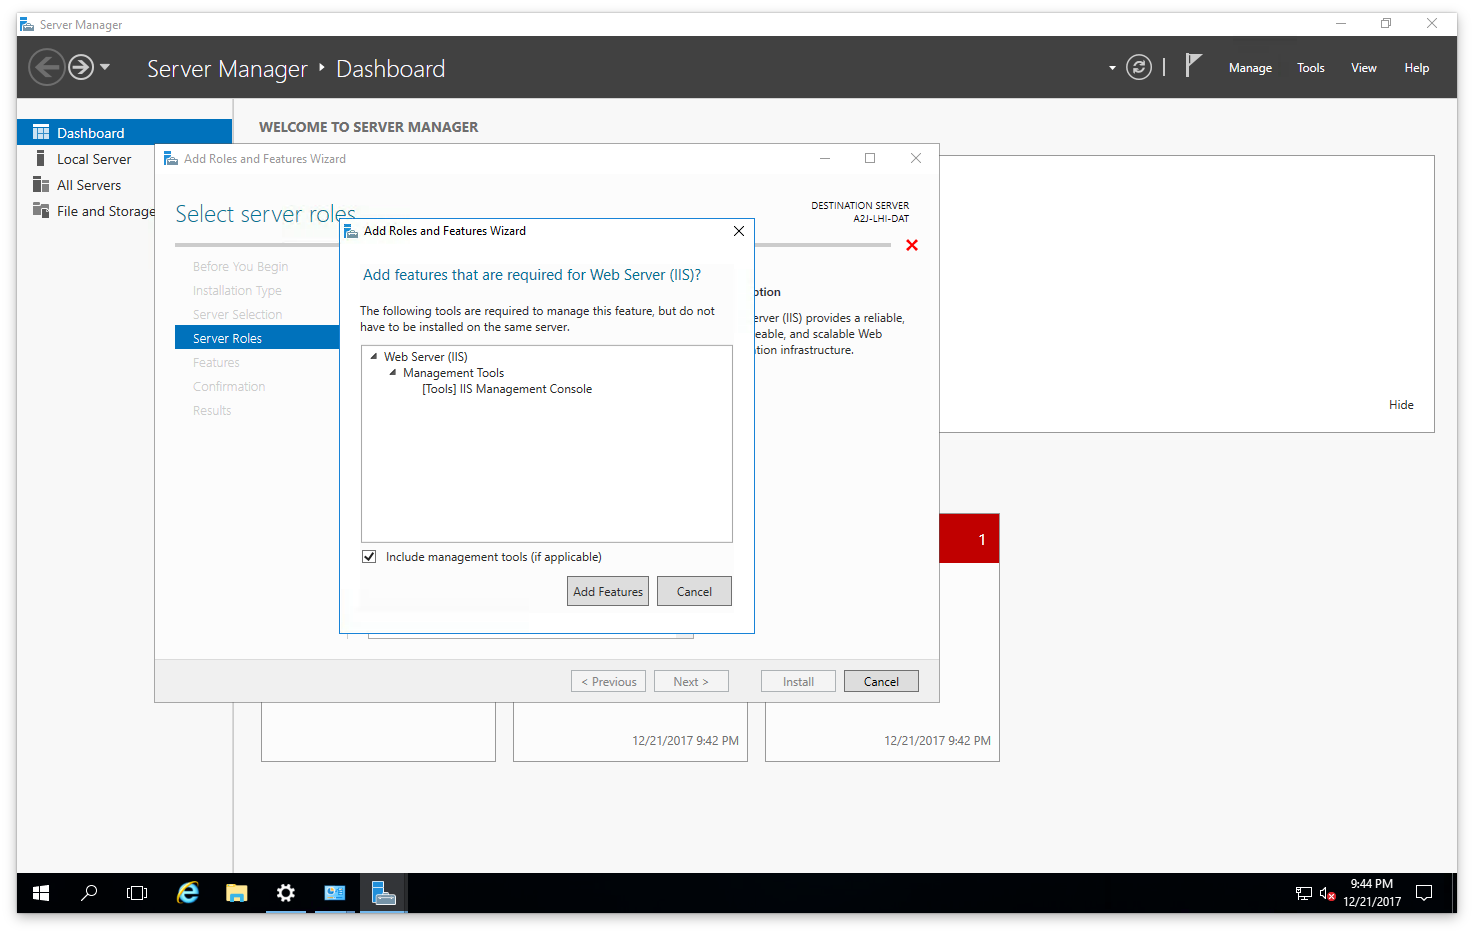
Click Add Features
Click Next

Several options will be pre selected
Select .NET Framework 3.5 Features

Click Next

Click Next to configure roles

Several default options will be preselected. Add HTTP Redirection

Scroll to Application Development and expand

Select ASP.NET 3.5 Extensibility. A prompt to install the .NET dependency will appear. Click Add Features.


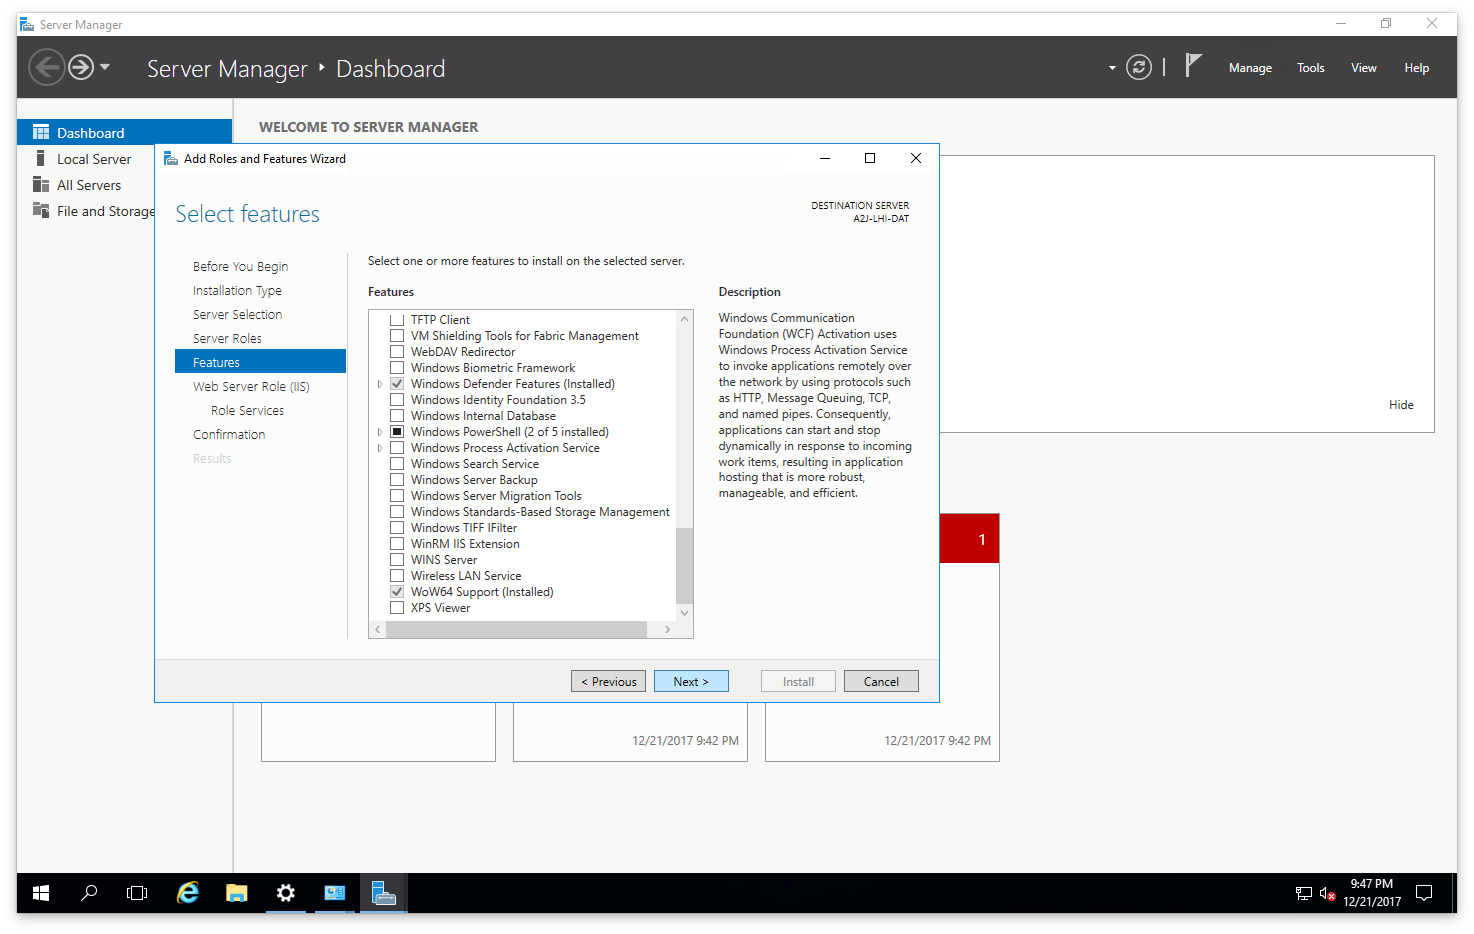
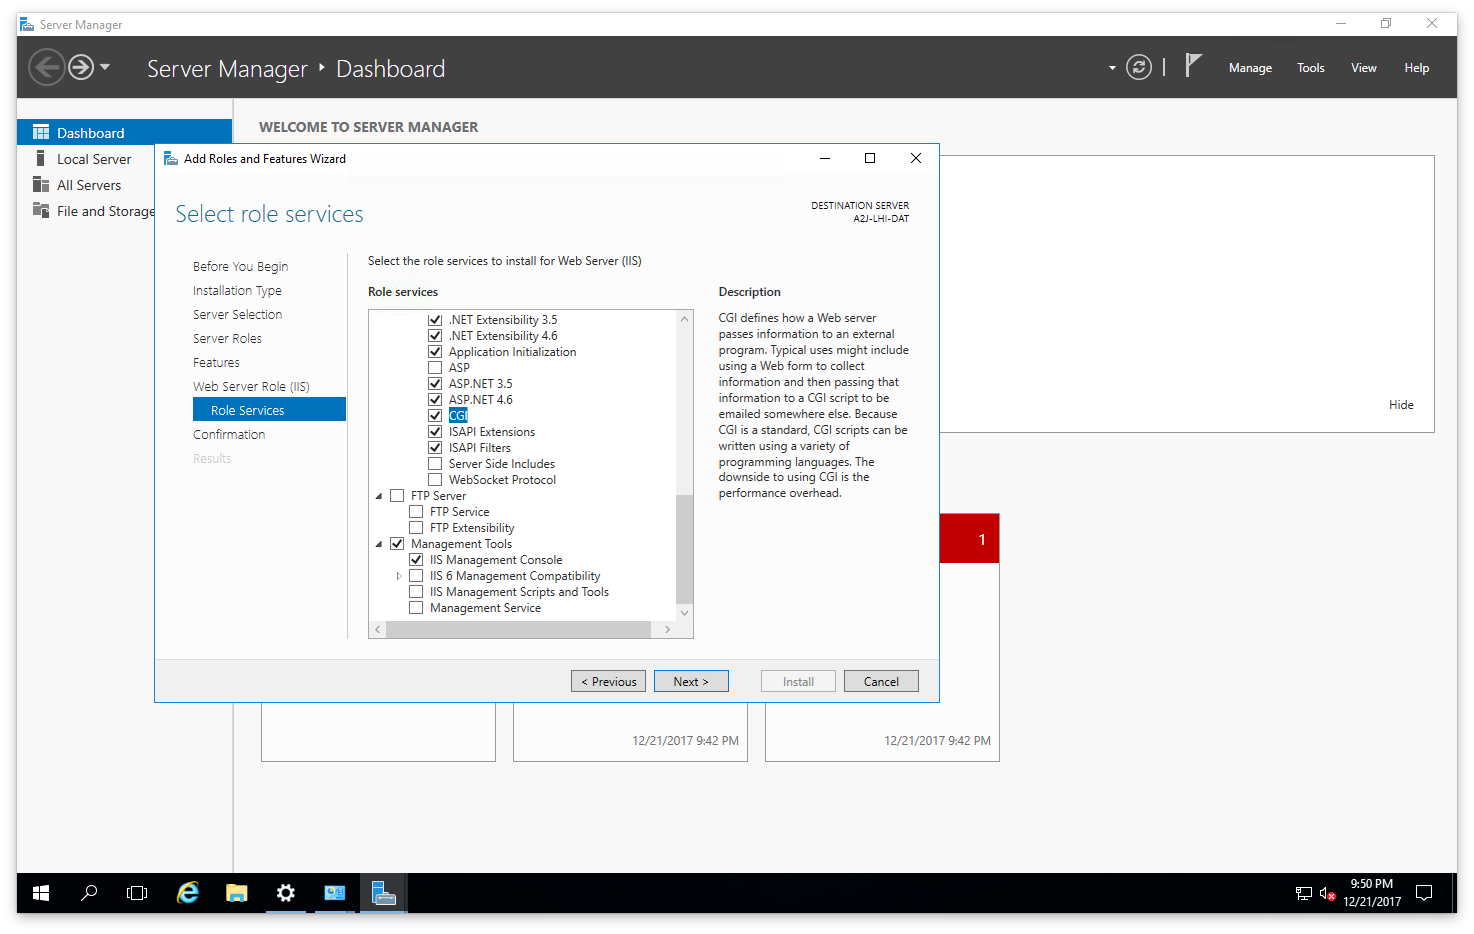
Select .NET Framework 4.6, Application Initialization, ASP.NET 3.5 ASP.NET 4.6, CGI, ISAPI Extenstions, ISAPI Filters
Click Next

Review and click install and wait for the process to complete. This can take up to 2 hours
Install Node:
Node is the primary backend environment for the DAT. Download and run the latest node 6 LTS from https://nodejs.org The version used in this tutorial is node 6.9.5 which can be downloaded directly here https://nodejs.org/dist/v6.9.5/node-v6.9.5-x64.msi. If another version of node is used, the DAT may need to be recompiled.
Install NVM:
https://github.com/coreybutler/nvm-windows
|
nvm install 6.9.5 nvm use 6.9.5 |
Ensure Node is in PATH:
The node installer might not always set the PATH variable correctly. Check Environment variables to ensure that there is an entry for the folder containing node.exe. For this tutorial that folder is C:\Program Files\nodejs\.
Confirm Node is properly installed:
Open a terminal and check the node version
|
node -v |
Configure Node Permissions:
Node.exe must be added to the IIS_IUSRS group in order to be allowed to handle requests. Open a command prompt and run as administrator and run
|
icacls “%programfiles%\nodejs\node.exe” /grant IIS_IUSRS:rx |
Prepare to install PHP:
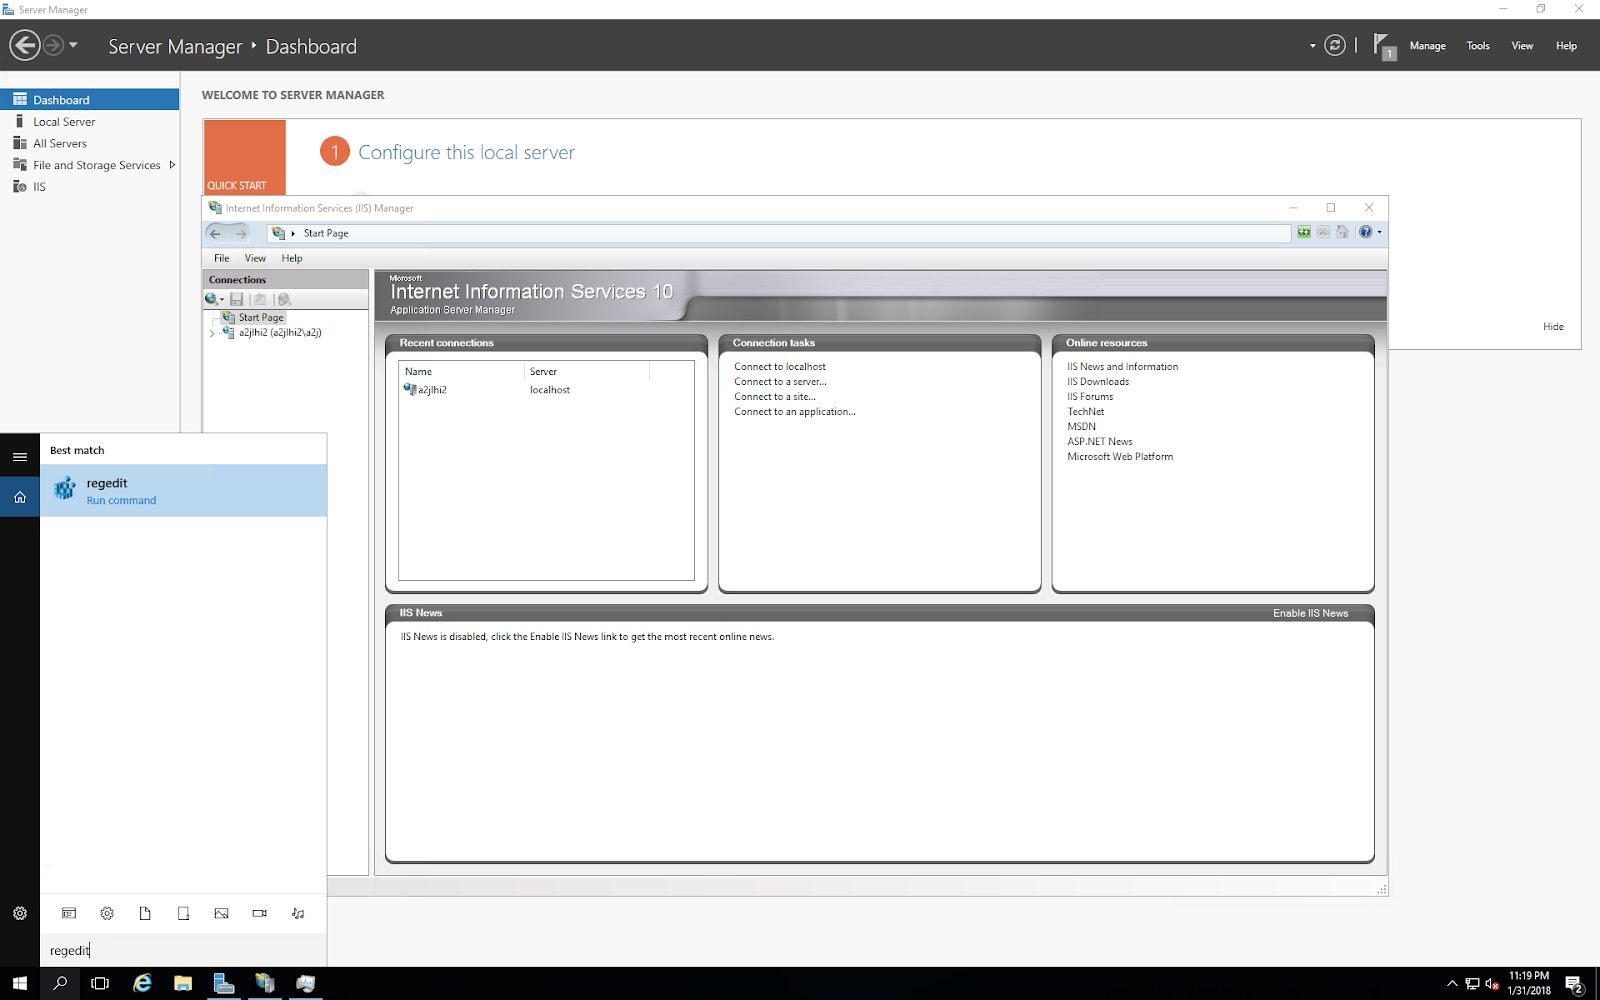
A setting must be temporarily changed to install the PHP Manager PHP dependency on Windows 10. Open the registry editor. This can be done by typing regedit in the search windows bar.
In regedit, go to
HKEY_LOCAL_MACHINE/SYSTEM/CurrentControlSet/Services/W3SVC/Parameters/MajorVersion
Change the MajorVersion value 0x0000a0 to 0x000008


Prepare to install IISNode:
Download and run Microsoft Visual C++ 2010 redistributable Which is a dependency for IISNode https://www.microsoft.com/en-US/Download/confirmation.aspx?id=14632
Install Web Platform Installer (WPI):
The web platform installer is a basic package manager for IIS. Download and run the Web Platform Installer from http://go.microsoft.com/fwlink/?LinkId=255386
Or follow the directions below:
Alternate Instructions for installing Web Platform Installer:
Open IIS Manager. This can be done by typing inetmgr in the search box.

Select the site root
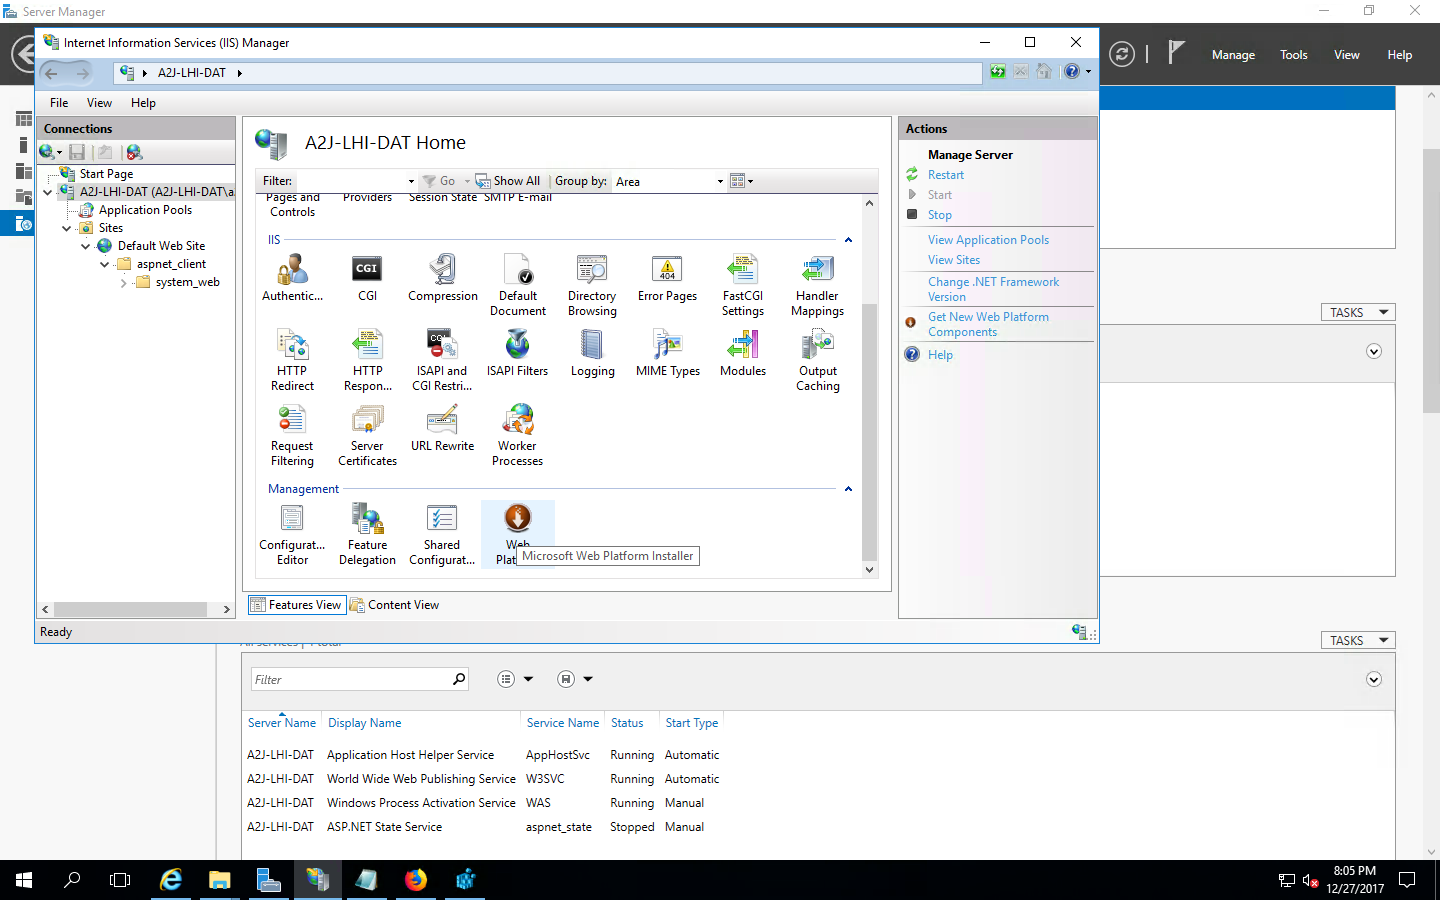
Select Get New Web Platform Components on the right side bar

Clicking will open a browser to the WPI download page.

Download and run

Install PHP:
Open IIS and the Web Platform Installer


Type php 7 in the search bar. Add the latest available for your platform. For this VM at this time,this version was 7.1.7 (x64). This is different from the IIS Express version. Do not install the IIS Express version.

Install IISNode:
IISNode is an IIS module that manages the node process. The IISNode module in WPI is usually extremely out of date. Go to https://github.com/tjanczuk/iisnode/releases and download the latest available full version of IISNode. The full version allows for debugging and includes examples. The version used in this tutorial is 0.2.21 located at https://github.com/tjanczuk/iisnode/releases/download/v0.2.21/iisnode-full-v0.2.21-x64.msi
Reset registry settings:
Open the registry editor and reset the previously changed key to its original value.
Go to
HKEY_LOCAL_MACHINE/SYSTEM/CurrentControlSet/Services/W3SVC/Parameters/MajorVersion
Change the MajorVersion value 0x000008 to 0x0000a0
Install CALI Software ( Viewer + DAT):
The DAT and viewer have been separated for flexibility in configuration and upgradability. Download the latest DAT and extract it to the webroot. Download the latest viewer from https://github.com/CCALI/A2JViewer and extract it to webroot. Webroot on the machine in this example is C:\inetpub\wwwroot . Following this step the folder structure should look like
<C:\inetpub\wwwroot>
+DAT
++bin
++dist
++examples
++js
++lib
++node_modules
++src
++test
++views
++config.json
++DAT instructions
++npm-shrinkwrap.json
++package.json
+a2jviewer
++viewer
Install WKHTMLTOPDF
WKHTMLTOPDF is the engine used to transform interview data into PDF from an intermediate HTML file. Download the latest stable version from https://wkhtmltopdf.org/downloads.html and install it in the VM. Make a note of the install path. The version used for this tutorial is 0.12.4 and can be obtained from https://github.com/wkhtmltopdf/wkhtmltopdf/releases/download/0.12.4/wkhtmltox-0.12.4_msvc2015-win64.exe. It was installed to C:\Program Files\wkhtmltopdf\bin
Configure DAT:
Since the A2J software can run on many platforms, there is a small amount of platform specific configuration that is necessary. Navigate to the root of the DAT in your websites folder. Open config.json
The Most important keys are:
SERVER_URL- required to establish target endpoints for API
GUIDES_DIR- required to establish location of templates
GUIDES_URL- relative web location of guides
WKHTMLTOPDF_PATH- path to binary of WKHTMLTOPDF
All other keys must be present but the value is irrelevant.
Ensure that the value for the key WKHTMLTOPDF_PATH matches the path noted above where WKHTMLTOPDF is installed. Backslashes are special characters in json so each backslash must be typed twice to escape them and work properly.
The config.json used in this tutorial is below:
|
{ "SERVER_URL": "http://localhost", "GUIDES_DIR": "C:\\inetpub\\wwwroot\\a2j-viewer\\guides", "GUIDES_URL": "/a2j-viewer/guides", "SQL_HOST": "localhost", "SQL_USERNAME": "root", "SQL_PASSWD": "root", "SQL_DBNAME": "caja", "SQL_PORT": 3306, "DRUPAL_HOST": "localhost", "DRUPAL_USERNAME": "root", "DRUPAL_PASSWD": "root", "DRUPAL_DBNAME": "D7commons", "DRUPAL_PORT": 3306, "WKHTMLTOPDF_PATH": "C:\\Program Files\\wkhtmltopdf\\bin\\wkhtmltopdf" } |
Save config.json to the parent folder of the DAT.
Configure Permissions:
Node and IISNode require permissions to write to the DAT folder for logging and debugging purposes. Navigate to the webroot. Right click on the DAT folder and select properties


Select the Security tab.
Select Edit Permissions and give groups Users and IIS_IUSERS write permissions to this folder.


Configure Server:
The DAT is a simple restful interface with endpoints located at <host>/api/. Requests must be routed through the node /bin/www target. We will setup a reverse proxy to accomplish this.
The file web.config contains all the commands needed. Place it in the webroot.
The web.config used is below:
|
<?xml version="1.0" encoding="UTF-8"?> <configuration> <system.webServer> <handlers> <add name="iisnode" path="DAT/bin/www" verb="*" modules="iisnode" /> </handlers> <rewrite> <rules> <rule name="myapp"> <match url="(api/.*)" /> <action type="Rewrite" url="DAT/bin/www/{R:1}" /> </rule> </rules> </rewrite> <security> <requestFiltering> <hiddenSegments> <remove segment="bin" /> </hiddenSegments> </requestFiltering> </security> </system.webServer> </configuration> |
The handlers directive commands iis to use iisnode to handle the bin/www javascript source file.
The rewrite directive allows commands iis to watch for any url matching to and beyond the <host>/api endpoint and send those Requests to bin/www.
The security directive relaxes the IIS restriction on requests to the bin folder.
Test the DAT:
Open a browser and navigate to localhost/a2j-viewer/viewer. This will open the demonstration page. Run the default interview. At the end of the interview, after selecting Generate DOC from A2J DAT Template, a pdf will be generated


